Tuesday, May 31, 2011

Mergers and Acquisitions

Just like the post says, even though I don't really understand what it means. Here are some newly merged acquisitions to our humble abode. (haha, that's not even close to the right usage of those terms).

A friend gave me a gift card to ModCloth (aka cutest vintage inspired online store ever) and I went bananas for this little "snooze button" coaster set. Holy cuteness. Oh my goodness.


Ya, it's a tiny bed with little quilted blanket coasters. It's the perfect way to incorporate dollhouse decor into an adults home, loving it.

I also got this precious "nest of nectar" sugar dish from ModCloth. I love shiny white ceramic things, clearly.


Gaaaaaa. I love this sugar dish. I might use it to store jewelry in though, haven't decided yet.

I am also the proud new owner of a ceramic elephant tea pot, which I found at Tyler Florence's store in Mill Valley. This little guy makes me ridiculously happy.


And, on a recent flea market trip I found this amazing vintage scale for $3! I didn't even realize until later that it says "Made in Greece" right on the front! My Greek relatives will be proud. My mom thinks it was used for measuring spices probably.


It has a little lean to it, but I think it makes it look even cuter. I won't be using it for measuring anytime soon, or ever.

So, these are the acquisitions for now. Still on the hunt for a buffet and new curtains for the kitchen. These little knick knacks will easily tide me over until then.

Monday, May 30, 2011

Finished Kitchen!

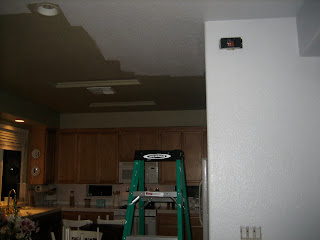
It took me a full day (started Friday night and finished Saturday evening) but I finally finished painting the kitchen!


I am very impressed with myself, this is the first full room I have painted with no help whatsoever, but boy was I sore the next day! I got crampy hands when I was just about finished too, looked like I was doing the "live long and prosper" sign when I was cutting in the trim, hahaha.

Here is the midway point when I finished Friday night...


You can really see how dark the room felt before with the yucky green color. By Saturday afternoon it was looking more like this...


I hated the chaos in the kitchen at this point. The BF was slaving away in our backyard while I was working in the kitchen, and between both projects the house got really disorderly very fast. That's what I get for starting another project when we are already in the midst of another one, haha.

So I can check this one off my project list. I don't feel the need to paint the cabinets white anymore because the room feels much brighter with the wall color change. It came out a little more blue than I expected, but I really like it still. Here are more after shots!


I made a little mail/key station in the awkward little nook to the left, so this area feels like it has more of a purpose now.


But, this little storage cabinet used to be underneath the shelves in the kitchen, so I am on the hunt for a new buffet for the kitchen to store our wine and nicer dishes in.


I also plan on finding nicer curtains for the sliding door area, and some new artwork for the now empty walls here and there. Add it to the list!

Before...


And after!


Ahh, I love our kitchen now. Funny what a coat of paint (or two cans, who's counting) can do to a room! It really feels like our house now. Wish I had done this sooner!

Wednesday, May 25, 2011

DIY Headboard Inspiration

We recently purchased a mammoth sized California King bed, and it looks oh-so-lonely without a headboard of any kind. I looooove the look of tufted headboards, but there is no way I am spending over a thousand dollars on one. With the help of the BF, who has offered up his knowledge of power tools, we plan on creating our own tufted headboard.

Here's the look I am going for...


This headboard has everything I am looking for in our DIY version. Tufting on the front, a nail head boarder, and the shape is exactly what I imagined as well. Sooo cute. (I also am in love with the sunburst mirror, but that is a whole other subject. Must focus on headboard.) I think I would go for a darker fabric though, more of a deep beige.

I also love the Raleigh headboard by Pottery Barn...


The shape is great, and the nail head border is more subtle when placed around the edges of the headboard. There is also the Georgetown tufted headboard by Pottery Barn...


It is a much simpler shape, so we wouldn't have to make any special cuts when making our own version.

So in summary, we can go simple and only do tufting, only do nail head trim, do neither and have a really pretty shape, or do a combination of all of these ideas.

Breakdown on our DIY version:  The plan is to purchase a large piece of plywood cut to the shape we want, adhere a thick amount of foam batting to it, cover it in fabric, and pull through buttons to pre-drilled holes in the plywood to get the look of tufting. If we choose to do nail head detailing, we'll apply those at the end.

So before I begin, I am on the hunt for the perfect fabric. I want something really durable, almost like a hemp material. I plan on making the headboard with lots and lots of batting to enhance the look of the tufting, and this means we'll need a stronger fabric. I'll start by perusing my favorite website for fabric, for an upholstery grade fabric that meets these requirements. This could actually be the longest part of the process, hahaha. Oy vey, the fabric options always intimidate me!

As the planning stages for this project continue, we are going to estimate the amount of paint needed for our kitchen. We're buying the paint soon, and (fingers crossed) the kitchen will be completed this weekend.

(We have also been tackling our backyard landscaping for the past few weeks, so it looks like I will be painting our kitchen solo while the BF finishes things up outside. I expect to be covered in paint in no time, haha)

Tuesday, May 24, 2011

One in a Million

I've narrowed down the millions of paint options for the kitchen (ahem, much like the abundance of fabric choices that I often struggle with) to my final choice! Drum roll please....

I have chosen Glidden's "Arctic Stone"!


It is the perfect soft grey-blue color, and really lightens up the kitchen. I painted three swatches around the kitchen, to see how the color looks in different amounts of lighting. It is by far the best color, not too girly blue and not too boring grey.

(Speaking of grey, do you spell it grey or gray? I always thought e-y looked better than a-y. Guess it's a Great Britain vs. America thing. I'm going with the Brits on this one!)

I get to painting this weekend, and I always seem to think painting is way easier than it is before I start. Half way through I realize how difficult and tedious it is...hmmm. Just hope I only need two coats to cover the sage color that is in there now. Think I might even give the baseboards a new coat of white, if I feel so inclined of course.

Monday, May 23, 2011

Kitchen Paint Color

We've lived in our house for about a year and a half, and so far we have only managed to paint our guest bedroom.  The colors in the house aren't incredibly offensive, but they also aren't really anything I would have chosen myself. I've come to understand that we probably will never paint our living room (due to the fact that the ceilings are about 20-25 ft high), so I've set my sights on our kitchen.

The kitchen is currently a sage green color, which I feel is too dark for the light-and-airy kitchen I want it to be.

The main problem I have in choosing a new paint color, however, is my obsession with all things turquoise and Tiffany blue. I don't want to go overboard with this color, as I already have many accents around the room in this shade (note the precious hexagon tray I snagged at Marshall's this weekend for $10.00!). I was thinking of choosing a more grey-blue tone to offset the brighter blues in the room already. Maybe something more like these...


Martha Stewart's "Frost"


Behr's "Fresh Day"


Behr's "Quietude"


I've already tested about five or six colors, hidden behind my kitchen cork board of course, hehe. I'm finally narrowing down my options, but it sure has been difficult. I better make up my mind soon, the BF has given me the green light to paint the kitchen myself! Wish me luck :)

Tuesday, May 17, 2011

Fun with Fabrics!

Alright, I admit it. I am not the best seamstress in the world. I don't own a sewing machine, but I am handy dandy with a staple gun. That's more my speed I suppose. Sooo, give me some fabric and a full staple gun, and I can go to work.

I recently ordered some new fabric for my hope chest, after the last fabric just bugged me too much. It was too bold and busy for the style of the chest. I replaced it with this sweet pattern I found at fabric.com for $6.98 a yard!


(pardon the Toby bed in the corner, a dog's gotta sleep somewhere, right?)


We have the hope chest in our bedroom now, and the bold turquoise damask print I had planned for the living room no longer worked with the softer and lighter colors in our bedroom. We recently purchased a GIGANTIC California king bed also, and I'm keeping the linens crisp white (easy to bleach and the room feels like a spa retreat now). With such a stark-white/gigantic bed in the room, the hope chest needed to be subdued in a calmer print, hence the cute birdy-flower-swirly fabric choice.

I'm also using this new fabric to cover the glass on our T.V. center/ place where the BF stores his shirts.


I love how it pulls from the blue birdies on the hope chest fabric. I'm obsessed with lattice patterned fabric, and really would love to use Kelly Wearstler's "imperial trellis" fabric for something, but at over $200 a yard, it's just not in the budget right now.


Seriously, who pays that much for fabric? Crazy talk.

I also picked up some new fabric for our two dining room chairs with upholstered seats that I got from Cragislist for $15 a piece a few years back.


The seats are kind of a strange shape though so I am waiting to tackle the project until this weekend. Pillows for our ginormous bed will also happen in the future, once I get past this I-don't-know-how-to-sew speed bump. :)

Thursday, May 12, 2011

Tufted Faux-Leather Amazingness

Yes, that is what this bench is, clearly. It did have a weird factory-plastic smell though when I first unwrapped it, hopefully that dissipates soon.


Yes, Toby is in all of my pictures. It's because he knows how pretty he is, of course. Here's a closer shot, with Muffin now inspecting the construction underneath.


I'm in love. The tufting on the top softens it up a bit, and it makes the room feel more mature to me. Pottery Barnish maybe? I'll take it.


Wednesday, May 11, 2011

Area Rug Aftermath

Ok, I'll admit it, when I buy one new item for a room I feel the need to redecorate the room completely. This was the oh-so-familiar story yesterday. I had ordered a new area rug for my living room, something with more color and a large scale pattern, and it finally arrived at my doorstep! But, of course, with this new rug came the need to adjust all the other decor in the room. Starting with the throw pillows...


I had some Pottery Barn pillows I had purchased on sale, which actually fit really well with the color pallet in the room now. The rug has darker yellow, olive green and turquoise/blue colors in it, which gives the room warmth that was lacking before (I had a beige damask print rug before).


So, the rug changed, most of the pillows changed, and then I had to remove the hope chest in this room because the print was way too bright for the softer/warm tones in the room (actually going to reupholster the hope chest again because I don't love the print anymore, haha). So, in place of the hope chest I ordered a faux leather storage bench with tufting (gahh so cute!) to bring some texture and richer tones into the room.


I'm smitten. I think, possibly, that when this bench arrives today I might not need to redecorate the living room anymore. I can't make any promises though, and luckily the bf has gotten used to coming home from work to a completely different arrangement every day. Hehehee.


So, in summary, we have the old living room rug in the office now, hope chest is in our bedroom, and a new storage bench and area rug for the living room. And, in other news, check out the awesome mirror my antique restoring uncle gave me! Can't wait to give it a fresh coat of white paint, it's primed and ready!


More details on this later though, time to set my eye on another room in the house to redecorate, wish me luck! :)


Thursday, May 5, 2011

The Makings of a Gallery Wall

I have loved the look of gallery walls for months now, but was having trouble figuring out a good location for one in my home. In a moment of genius (and because of another crafty idea I am working on), I took down the large frame I had by itself in our entry way and replaced it with a new family of smaller frames.


We have a cute pair of love birds...


A pretty picture of the sunset in Santa Cruz I took that I had been meaning to frame...


Some scrabble inspired lovin' found on Etsy....


I don't have the before photo of the other frame, but it was a large distressed brown frame with a black and white photo in it, which felt too dark for the room. Sooo, I went on an Easter egg hunt through my house and collected some new frames, and basically free styled the arrangement.


I tried to avoid a really symmetrical arrangement, and went for a more free hand approach. It's really cool to view from the kitchen also, because the frames I have in there mimic the arrangement in the living room now! Almost like a continuation of the gallery wall in another room.


I've been meaning to add more frames to the arrangement in the kitchen too, so this will vamp up the look as well. Love it, and it cost me nothing since I had all the frames! Free is my favorite.

Tuesday, May 3, 2011

The Day that Heidi Discovered Spray Paint

In reading many interior design related blogs, I found that spray paint is a DIY'ers best friend. However, I was always more of a paintbrush kinda gal. Maybe I just never really needed to spray paint anything, who knows. In my quest for more outdoor lighting, I discovered the perfect use for a little spray painting TLC.

I had these cute little candle holders given to me recently, and I was having trouble finding a place for them inside. So, I figured I could use them outside instead, maybe even for citronella candles when bug season comes.


The only problem with this plan was that they would blend in too well with our wood fence, so a pop of color was needed. Insert spray paint here.


After a few good coats of bright yellow spray paint, the bf installed some wood screws to the fence for hanging these beauties.


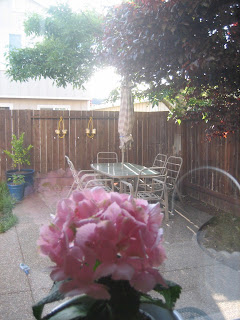
ta da! I especially love how they contrast with my bright blue ceramic pots I have next to them. I am kinda crazy about bright blue and yellow right now, hence the lemon tree in a bright blue pot (now if only it would produce some nice Meyer lemons already...)


Also, I can see them from my kitchen window! It definitely makes our outdoor space feel like an extra little room.


And they are oh so pretty at night time too, and will give our seating area a little burst of light.


I'm thinking maybe some tea lights in mason jars for them too, then wind won't be an issue and I love me some cutie mason jars.

Overall, this project cost me $4 for spray paint, totally worth it. Now to scrub the rest of the bright yellow paint off of my fingers. Lesson for next spray paint adventure? Wear rubber gloves. :)